Subtotal: $0.00 Cart

  • the source of our inspiration


    premium, archival fine art inkjet papers wrapped in the intimacy of a rural culture

    @Jenniferking_photographer
  • Free MOAB classes


    videos and livestreams released weekly

  • juniper baryta rag


    our best reviewed and most award-winning paper yet

Choosing An Inkjet Paper For Your Work

One question we're asked often at Moab Paper, is how do I choose a paper that best represents my work? This video gives you a few tips to make the decision easier.

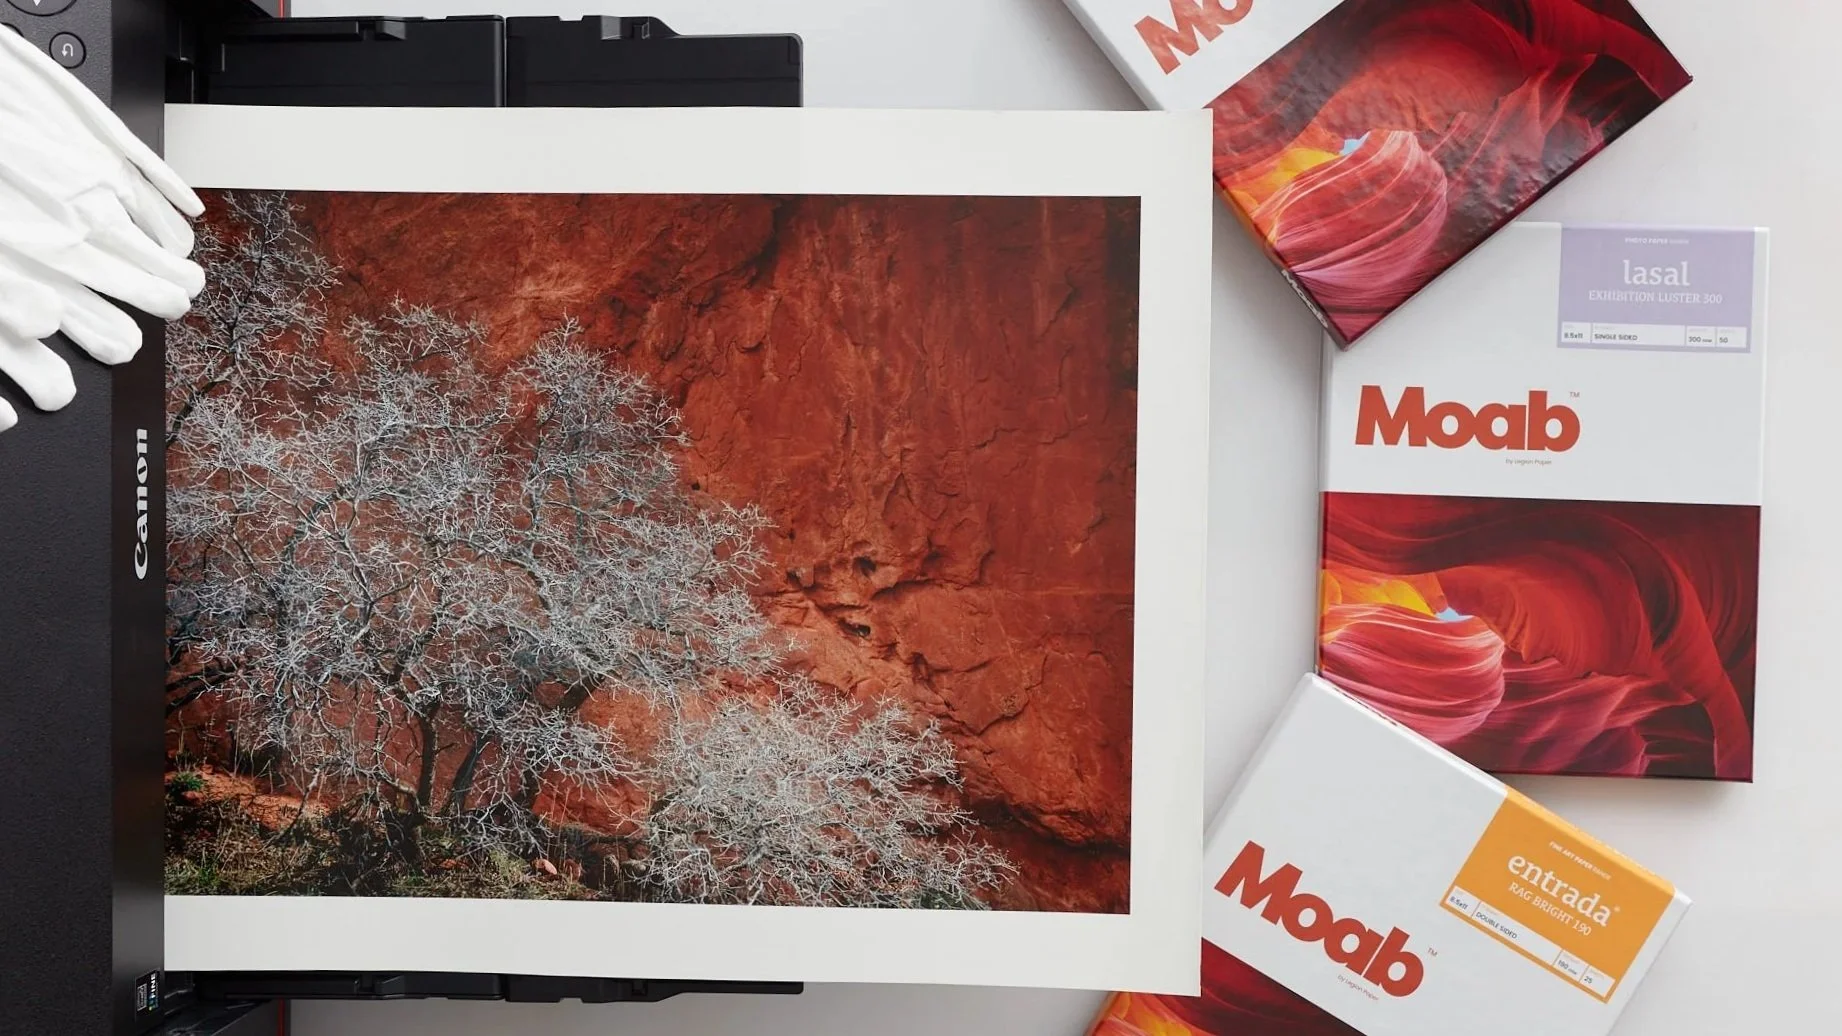
Papers are divided into two groups. Photo Black (glossy papers) or Matte Black (matte papers).

Photo Black papers in the Moab line:

Photo black papers have some sort of reflective finish, reflecting more light back to the viewer, making colors look more saturated and blacks a little darker.

Slickrock Metallic Pearl

Lasal Exhibition Luster

Juniper Baryta Rag

Matte Black papers in the Moab line:

Matte Blacks have no sheen, reflecting less light, so colors will look less saturated and blacks won't look as dark.

Lasal Photo Matte

Entrada Rag

Moenkopi Unryu

How to Protect Your Inkjet Prints

Moab Master, Les Picker, demonstrates how to use Moab Desert Varnish to protect your inkjet prints from scuffing, scratches and fingerprints.

The spray is 100% invisible and has no sheen whatsoever. There are sprays on the market that do this, but we decided it was better to leave the visible look of the print as-is.

When should you use it?

You can technically spray a print within 15 minutes after the print comes out of the printer, however I would wait a day. Pigment inks have a glycol that needs to evaporate 100%, and 99% of it is gone within a few minutes of printing. It is that last 1% that I would like to be sure about. The spray dries very very quickly, like 20 minutes. I would print, let sit for a day, spray, package up later that day. That means one day after your print is printed.

Tutorial for Printing Moab Artist Cards

A step by step tutorial for printing Moab Artist Cards and Entradalopes from Adobe Photoshop and Lightroom. This webinar covers image prep, print setup, and printing your message on the inside of the card.

Download instructions for installing Lightroom print templates.

Download Moab Card Templates (Zip File)

Shop Moab Artist Cards

Are All Print Fixative Sprays Created Equal?

BV5A7000 1.jpg

Author: L. Picker

04 Nov 2020

If you’ve not downloaded your free copy of the comprehensive guide to fine art printing with Lightroom, get it now!

We’re often asked by photographers who print whether they should fixative spray their fine art prints and, if so, what spray to use. Admittedly, this is somewhat of a loaded question and requires some background to answer fully. If you follow the path I’ll lay out here, I think you’ll come to a good understanding and a choice that will work for you.

Background First

I’ll set the stage by addressing a follow-up question to “Should I spray my prints?” That is, “Should I spray my glossy prints as well as my matte prints?”

The general rule of thumb is that if you are not placing your matte paper print behind UV glass, then it should be sprayed with a quality varnish. That is not the case with glossy or semi-gloss papers, as you’ll see.

The resin coatings on glossy papers are very sensitive to varnishes and will invariably lose some of their gloss when sprayed, no matter the quality of the spray. Our tests over the years have reinforced that. However, we’ve heard of situations where photographers have intentionally sprayed their glossy prints to achieve the level of glossiness they prefer. This would take a lot of practice.

Further, if you plan to hang a glossy print not behind glass, in a room exposed to sunlight, wether direct or indirect, the print will degrade over time, often in a matter of months.

So, while we included glossy papers in our test, the findings that any varnish will degrade the glossiness is no surprise. We just wanted to address the question of whether all papers should be sprayed.

Our Research

Since print sprays are such a frequent question, and to satisfy our own curiosity and ability to advise our readers, we began several years ago to carefully research the issue. We make several hundred fine art prints each year in our studio. Over the years we have purchased many different sprays and tested them on a variety of papers.

The fact is that not all print sprays are created equal. Ingredients and relative percentages of them in the formulation vary. Spray patterns and particle size varies. Different sprays can create very different effects on identical prints.

It’s important to understand that while we’ve tested several different brands, we have not tested all, so we can’t categorically say that a certain price range or list of ingredients is better than others. What we can and do recommend is that you try sprays on some test prints and carefully determine for yourself what works.

One bit of consumer advice is this: you stand a better chance of buying a quality varnish if it is sold under the brand name of a major, respected paper company. They have a stake in the game of ensuring you will get the best prints possible. If the paper company does not sell a self-branded spray, but recommends a third-party brand, stick to that recommendation.

Method

Obviously we can’t reproduce for you all the research we have done over the years. Instead, we recently tested a typical Brand X spray that is heavily advertised online and compared it with Moab Desert Spray. I won’t reveal the name of the Brand X spray, but I assure you it is typical of many others in that category that we tested.

We printed the same image on Moab Entrada Natural (a matte paper), Juniper Baryta Rag (a satin/semi-gloss paper) and Moab Slickrock Pearl (a super glossy paper). We then cut the images in half (to save paper).

We then sprayed one set of all three papers with Moab Desert Spray, and another set with Brand X. A control set was left unsprayed.

Each of the sprayed prints received two full coats, as recommended by the manufacturers. It should be noted that Brand X recommended more than two coats, but when we tried that the negative effects we documented (see below) were more pronounced, so we standardized on two coats.

The Evidence

Note: Demonstrating spray effects on a print using an image on a monitor is challenging and the following images do not fully show the differences I mention below.

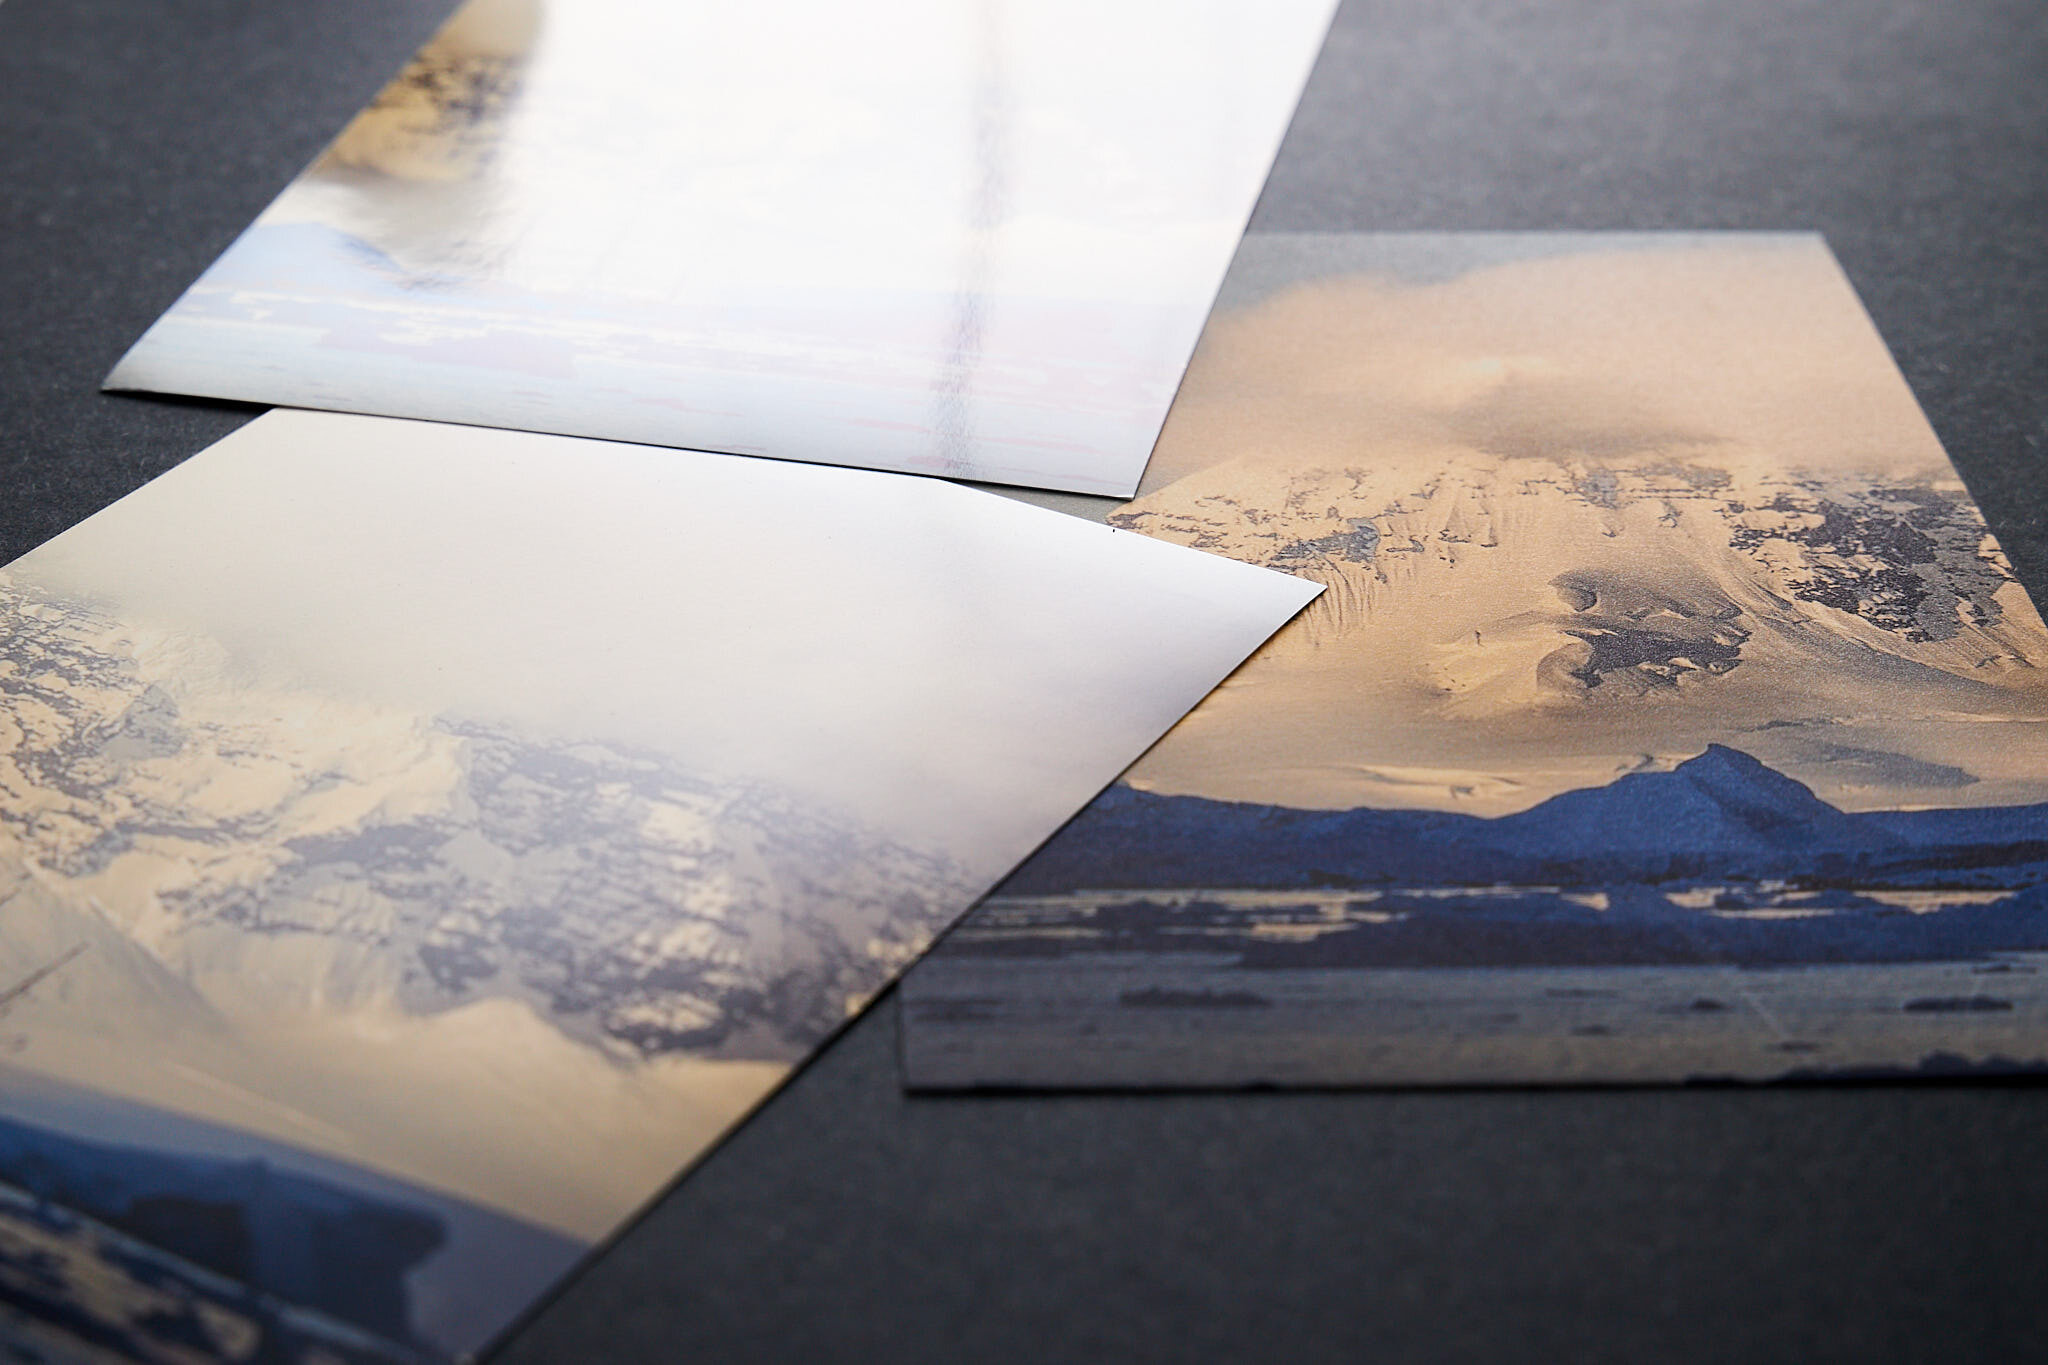
Our setup was simple; three rows of three prints. One was the control set, another was the Moab Desert Spray and the third was Brand X spray.

Moab Desert Spray vs Control.

Matte paper. Moab Desert Spray does an excellent job on the matte paper, preserving the blacks very well. It is invisible on the matte paper, with no haze or color cast. In our own studio we typically spray two coats of Desert Spray on our matte prints, unless they will soon be framed behind UV glass.

Satin/Semi-gloss paper. The same can be said for the satin/semi-gloss paper. Blacks are preserved but, as expected, there is a very slight dulling effect on the semi-gloss coating. However, when we showed the sprayed print to professional photographers they did not notice the dulling, until they placed it side-by-side with the control print.

High gloss paper. With the high gloss print there is an obvious dulling effect, although some observers might still rate it in the acceptable range. In effect spraying a very glossy print turns it into a semi-gloss print at best.

Brand X vs Control. In this set we compared Brand X spray with the controls.

Matte paper. We can immediately see the effect this spray has on the blacks, reducing the D-Max and trending them toward a noticeable washed-out appearance. There is also a visible, distracting mottled coating that is apparent on closer inspection.

Satin/Semi-gloss paper. Now the effects of Brand X are quite apparent. The glossiness is eliminated, blacks are muted, and there is a distinct objectionable rough and whitish mottled coating on the print that you can feel when you run a finger over it.

High gloss paper. As they say, fuggedaboudit! The print is completely ruined. The glossy coating is gone, blacks are subdued and a nasty white coating covers the print. Unfortunately, Brand-X turns everything into an ugly, low D-max matte print. You can see the effect close-up in the B&W description below.

BV5A7023.jpg

Black & White paper. For this test we used a heavy GSM matte paper. We sprayed one with Brand X and the other with Moab Desert Spray. Laying the two prints side by side we were stunned. Brand X again deposited a noticeable whitish layer on the print and reduced the contrast in the blacks and shadows, making them muddy and rendering the print unusable. You can actually feel that rough deposit as you run your finger over the print. (Please note that the Moab Desert Spray print was intentionally made as a toned print. We used available test prints that we keep for research purposes).

BV5A7121.jpg

Moab Desert Spray vs Brand X. Here is a quick summary of our findings:

  1. Moab Desert Spray projects a very fine, even mist with no spitting. Brand X has a coarser spray and periodically spits a glob of fixative, which spells the death of a print.

  2. Moab Desert Spray is slightly more expensive than some other brands but is not the most expensive on the market. Even some poorly performing brands are higher priced, so comparison shop.

  3. Both sprays have an expected effect on glossy papers, although the Moab Desert Spray result may still be acceptable while Brand X renders the print unusable.

We did not test for hardness (ability to prevent scratches) nor did we test for cost per print. However, if one compares the manufacturers’ recommendations, you would need more coats of Brand X for maximum effectiveness, thereby raising its price per print. We suggest reading the label before purchasing.

Lessons Learned

Here are some lessons to be learned about using fixative sprays:

They do protect. Fixative sprays do offer a degree of UV protection which is a real plus since UV light can degrade a print rather quickly. We regularly put two or three full coats on our matte paper prints if they will not be displayed behind UV glass. Sprays are also reported to add a bit of scratch protection, but we do not have the equipment to test that claim. However, the spray appears to protect against fingerprints, which is merely our anecdotal observation based on heavily handled prints in our studio.

Allow print to dry. Before you spray, allow the print to fully outgas for 24 hours.

Use proper technique. Make sure to use correct technique when spraying your prints. First, obsessively dust the print. Stay the recommended distance from the print, move your arm steadily across the print surface without bending your wrist. Start your spray off the print and end it off the print. One coat means spraying horizontally and then vertically, making sure to allow the recommended amount time between coats (usually 4-5 minutes). Always spray with your print hanging vertically. Spraying while the print is laying flat on a table can be disastrous if you get any “spitting” from the spray nozzle or if your technique is not good. Drips, runs and spit marks are permanent and will ruin the print. Wear a respirator and spray in a well ventilated area. Adhere to the room temperature recommendations of the manufacturer.

Discount the Internet. Be wary of Internet chatter on the topic. A lot of the product “reviews” are by shills that the manufacturer hires. Others are by photographers who have limited printing experience, have not tested sprays, and/or have not seen the differences between brands. Instead rely on the recommendations of experienced printers. Ask people in your photography club or email photographers whose work you admire, whose prints sell and who have excellent reviews from collectors. Some framing shops offer spray services to customers and can offer advice. However, be forewarned to have an exact duplicate print so you can compare the control print to what the framer has done. It’s easy to be fooled if you do not have a comparison print.

Test for yourself. Try different sprays and try them under different environmental conditions you will experience. For example, we have found that some sprays have radically different results at lower temperatures. Test sprays for every paper you plan to protect, until you find one (or two) you prefer.

You get what you pay for. Brands that sell for half the price of reputable brands do so for a reason. After spending so much time getting to a perfect print, do you really want to risk it by saving a few dollars?

Sprays are not formulated for high gloss papers. As mentioned above and as you can see from the images, glossy papers suffer from fixative sprays. The additives in glossy paper are sensitive to the chemicals in the fixative sprays and will lose some of the gloss when sprayed. Even semi-gloss/satin papers will be affected. In general, the glossier the paper, the more the spray will affect it, irrespective of brand.

Skip if behind glass. There is no need to spray a print that will be framed behind UV glass. UV glass is more expensive, but it offers more protection from UV rays and is often available with anti-glare properties.

A Guide to the Printing Process

Moab Technical Specialist, Evan Parker, guides us through each step of the printing process. Download the printing process notes here.

Here’s what you will learn throughout the video:

2:25 Why do we print?

2:57 Start with the best image file

4:30 Take your printer on a date

6:35 Tools for evaluating prints

11:05 Color Management: display profiling

17:20 Color Management: print (ICC) profiles

21:15 Color Management: media settings when printing

28:10 Soft proof & rendering intent

40:00 Making comparison prints

40:08 Selecting papers

46:50 Print longevity

53:35 Moab Sample Box

53:55 Further reading

54:30 Software updates

Helpful Links:

Buy the Moab Sample Box.

Subscribe to our YouTube Channel.

Register for future webinars.

ICC Profiles.

Douglas Kirkland: Coco & Marilyn

DK Marilyn HelsinkiWEB.jpg

The Finnish Museum of Photography's new exhibition space, named K1, will be opened with an inaugural showcase, featuring two exhibitions in one — Coco Chanel and An Evening with Marilyn — from Canadian photographer and Moab Master, Douglas Kirkland (b. 1934). The photographs depict two iconic women who developed a deep understanding of the power of vision and gaze.

Kirkland photographed Marilyn Monroe and Coco Chanel in the early 1960s while working at Look magazine. The images from six decades in the past deliver a dose of the Hollywood starlet cult and the history of fashion. Viewed today, the works offer a direct view into the early heyday of photography as a central feature of modern consumer culture. The exhibition also explores the life cycles of cultural icons, and the raw power of photography.

Douglas Kirkland is a photographer with a long career in Hollywood, known mainly for shooting renowned stars. He has also worked on more than 150 feature film productions.

Douglas Kirkland prints on Entrada Rag Natural. "I feel that Entrada Natural is the perfect paper for me because of the rich dimension it provides us for the fine art shows which we do in various parts of the world."

The exhibition is organized in collaboration with Photo Op.

How John Stanmeyer Chooses Which Images To Print

John Stanmeyer is a Photojournalist, founding member of the VII Photo agency, contributing photographer to National Geographic Magazine and other major publications around the world. With thousands of photos to sort through, how do you choose which images to print? Learn how John Stanmeyer chooses which of his photos are printed:

printing.jpg
printing3.jpg

When in studio, which is where all the printing magic occurs, the decision on which image is never direct or simple. When printing for myself, to feel and see an image in the beauty of the physical, I tend to choose complicated photographs. Photographs with subtle essential details in shadows, in highlights, bringing to life the moments I see in person, gently toned on a screen, bringing into the world all its uniqueness of the physical.

Majority of printing occurs in print sales to clients. Collector print requests can vary, whether seen on the pages of National Geographic magazine, on my Instagram page or website. Here too, the selections by each collector are unique, often the unexpected.

While there are is a broad range of prints requested, the most sought is the World Press image, Signal, from Djibouti. Signal is also one of the most complicated print…there are so many subtitles in the bluish inky evening under moonlight along the Red Sea.

Signal, Djibouti

Signal, Djibouti

The incredible power to create tangible art is achievable through a good monitor, in combination with an excellent printers and brilliant paper.

Elevate Your Art Through Prints

by Les Picker

DSCF7227 (1).jpg

Ansel Adams famously said, “The photograph is the score; the print is the performance.” I’d like to elaborate on that theme for those of you contemplating fine art printing and for experienced printers looking for new perspectives.

I grew up in New York City, where my father was a highly regarded amateur photographer. It was natural for us to go to museums and galleries to see exhibits of fine art prints by some of the greatest photographers; Dorothea Lange, Ansel Adams, Edward Weston, Henri Cartier Bresson, and others. I remember strolling through those galleries, mesmerized by the magic of the printed art. So, for me at least, prints were an organic part of the art of photography.

My grandfather was a professional photographer. He converted a bedroom in his apartment to a darkroom. To this day I remember the magic of seeing an image suddenly appear on a blank sheet of paper as worked under that red light.

Today the world of photography is drastically different. In the digital age, it is no longer a requirement to print, and this is a true sea change. In the past, the only yardstick we could use to measure an artist’s work was through the print. Today we have the Internet. There are some popular photographers who probably have never actually printed a single one of their images. They post on Instagram and have tens of thousands of followers. If they need a print they send the file to a lab.

So, Why Print?

With the arrival of the Internet and the profusion of digital printing labs, it makes perfect sense to ask, why bother to print? The answer is both simple and complex and if you consider yourself a serious photographer, whether amateur or pro, it’s worth taking the time to ponder it.

Simple first. If you want to sell your work, you have to print it. Most people do not buy digital images. Magazine editors are an exception, but they pay pauper’s pocket change for that privilege nowadays.

Not that selling prints is easy or should be your main objective with your photography. I’m just saying that if you want people to hang your art on a wall, you’ve got to print it.

DSC_3465.jpg

Okay, so why not just use a lab? If you’re thinking of selling inexpensive prints or want to gift them, sure, go ahead and use a lab. But, I’m here to tell you why you shouldn’t. If you’re a serious artist, that is.

There is nothing at all, in anything that you presently do to advance your photography, that will elevate your art like personally printing your work, whether in the wet darkroom or digitally. Nothing. Full stop.

Printing is an extension of your photographic art. It requires you to view your work critically. If your work is not up to par in camera, it will look horrible on paper. Even if it is technically perfect, nurturing it to a final print is like going from making a baby to actually birthing one (with apologies to all you women out there for this awful and completely inaccurate analogy). The process is difficult and oftentimes painful. Creating a print forces us to scrutinize our art at a level that challenges our perceptions of our own work (and even our self esteem, truth be told).

DSC_3589.jpg

But printing also works in reverse. As you become more attuned to extending your art to the print, you begin to reassess what you choose to capture in camera, how you capture it and, most importantly, why you choose to capture it. While in the field you start to imagine what the image will look like in print. And that is a true gift. You will begin to think through your imagery, to pre-visualize the composition and the resultant print, and to slow down.

Here’s a secret that professionals know but don’t often talk about. One of the major differences between a successful, experienced pro and an amateur is that the pro knows when not to take a picture. I see so many photographers desperately press down on the shutter release at 12 frames per second like their lives depended on it, hoping that one of a thousand shots will work. Understanding that your final statement of your art will be evidenced on paper will slow down that process and result in far better images in camera.

And More

There is another aspect of printing that I feel doesn’t get enough attention. I’m talking about the tactile sensuality of fine art paper itself. In today’s world I believe we have the finest photographic art papers ever made. In our studio we use Moab Fine Art papers (a division of Legion Papers) and we are sponsored by them. Of course there are other wonderful paper manufacturers out there. Still, when we handle a printed sheet of Moab Entrada Rag Textured, for example, the tactile sensation itself adds to the artistic experience. I know that sounds a bit esoteric, but that’s the point. The reverence with which you hold the final print, by definition will make you a more thoughtful photographer. Call it the Zen of Photography or whatever you will, but don’t knock it until you have experienced it yourself.

Did you know that the average length of time a person spends scanning an Internet image is 2.3 seconds? Contrast that with how many minutes someone spends viewing a fine art print. ‘Nuf said.

And speaking of viewing Internet images, I frequently watch people spending time on Instagram and “liking” images. I am stunned by how quickly they are able to scan and hit that heart emoji. I asked a young man at an airport how he was able to judge them so quickly. “Oh, if the picture jumps out at me, I know that I like it.” Really?

So this is what so many photographers do to get that fleeting attention. They ramp up the contrast, clarity or whatever. They super-saturate and over-sharpen. They over-HDR images to gain followers.

Working an image to print, especially in black and white, makes you appreciate tonality. It gives you an educated understanding of subtlety. Prints that celebrate minimalism are lauded worldwide. Collectors pay boku bucks for such works.

Consider the Source

Of course I could be criticized for this being a self-serving blog, as my assistant and I teach digital fine art printing in our Maryland studio. I have written an e-Book on fine art digital printing (available free due to the generosity of our sponsors, Moab and X-Rite). I frequently lecture on the topic and serve as a judge at print competitions. And I sell my fine art prints.

DSCF0216.jpg

But in my defense, I did not come to fine art printing easily. Truthfully, way back when I hated the wet darkroom and its carcinogenic chemicals. Plus I’ve never been a patient person and taking an entire day to generate one measly print did not fit my definition of productivity. And, as an environmentalist, the thought of chucking those chemicals down the drain did not please me. But, having been raised to appreciate fine art prints, I was delighted by how quickly digital printing evolved.

And the papers! We are living in the golden age of fine art papers, with literally hundreds of wonderful choices. Printers have become so sophisticated and reasonably priced they are marvels of engineering, putting out prints that are a joy to behold. So for me, my workflow doesn’t end until I see that special image on fine art paper.

There are more than a billion people out there who consider themselves photographers. As long as they enjoy what they do and what photography does for them, that’s fine, no matter where their workflow ends. But to rise to the level of a true photographic artist, nothing is as helpful and enduring as printing your own work.

“The photograph is the score; the print is the performance.”

Power of Print: Stephen Vanasco

stephen_vanasco.jpg

Stephen Vanasco was first exposed to photography through the 90’s skateboard scene. Having grown up studying magazines such as Thrasher,Slap,Big Brother & Transworld he was shown early on that making photographs could be a self expressive and creative outlet. This ideology mixed with the mindset and approach to life skateboarding would give him would have a profound impact in his life for years to come. Stephen has a passion for printing, for sharing his images in a tangible form rather than swiping through the small digital images on his phone.

"The biggest power of printing your work is the ability to self audit. It is one of the purest ways to look at yourself and ask where have you been with your photography? What are you doing now with it? Where do you want to go with it? In the form or print and truly looking at your work is how one can answer these questions for themselves and to see their way of making photos evolve.” - Stephen Vanasco

Learn more about about Stephen and his work.

Tell us about yourself and your work.

My name is Stephen Vanasco. I was born in NY and raised in LA. I grew up exposed to skateboarding and underground hip-hop at the time which had an immense everlasting impact on my outlook and approach in life. Skateboarding demonstrated this idea that you don't have to confine yourself to one exact thing. You can be fluid but still leave the fingerprint of your style in whatever you do. This idea transcended into my photography. When people ask what type of photography do you do I just reply all of it. With an art form as creative as photography is it feels like a shame for one to limit themselves to one subject matter. Which I feel is reflected in my work since I shoot aerial, street, portraiture, abstract/fine art, etc. I love exploring how to see things. 

SVM8.jpg

How did you get into photography?

I didn't go to art school. I wasn't handed down a camera from someone in my family it was merely through a lucky opportunity. I was always inspired and attracted to photography but never fully fell into it due to my passion for skateboarding at the time. But with this offer I had the ability to work for someone and part of that job incorporated the ability to learn photography for their productions.

vanasco.jpg

Why is it important for you to print your work?

One of the initial ideas of that got me printing years ago was the fact I couldn't afford the cool art I wanted. So I saw printing my own photos was a way to not only start the ball rolling on how to print but to provide myself and friends with photos. Now a days I print my work to have a better understanding of what I am doing. I feel there is a translation to ones work that gets lost if you leave it on a digital screen. Aside from comprehension of the photos I make I also believe printing the photos you like is essential for archiving. Hard drives crash aside from other technical difficulties. Needless to say it is very important to have a physical copy of your most beloved photos around. The other bonus factor of printing is the idea of sharing your art whether gifting it to people or selling it. People may see a great photo you made through their phone or computer but giving them a print is so much more impactful. 

How did ‘one print a day’ start?

It was just an idea that when I can I try to run 1 print a day to not only motivate myself but to motivate others. Once your photo is done with whatever your process is... print it. It doesn't take that long and you will thank yourself later. 

 What papers do you use?

I love to explore all the papers Moab offers. They all have their own look that you see when applying different photos to them when printing. But I would say the Juniper Baryta Rag is my favorite by far. The weight, the texture the warmth along with the materials used to make it you can feel the quality in it when you pick up a sheet. Plus I love how it is universal in the sense it can work with black and white or color. A consistent look that extends my photographic signature. 

How do you choose a paper for your different images?

Picking a paper comes down to the photograph and which paper will go best with that photo. Understanding the colors and textures involved in the image and how it will translate to which paper you pick. Knowing how to use your printer and paper is equivalent to knowing how to use your camera with a favorite lens. It should become second nature. 

What's next we should be looking forward to?

As far as upcoming projects I have an aerial exhibit coming up (currently postponed- TBD on a new date) at the Regime Contemporary Gallery in L.A. Aside from that constantly printing, building on my work and planning whats next. 

52801033_10156663386678283_3678467243655561216_n.jpg

Dani Diamond Creates His Own Portfolio

"Like many out there I got lost in the digital world and completely neglected tangible forms of art. After 10 years of shooting I decided I must create a printed portfolio of my work. A portfolio I could tuck under my arm as I walk through the streets of Manhattan meeting with clients.Nothing tops the feeling of holding a print in your hands." - Dani Diamond

Fashion and portrait photographer, Dani Diamond, created his own portfolio using Entrada Rag Natural to showcase the last 10 years of his top work.

Paper: https://www.moabpaper.com/entrada-rag

More products Dani used through his YouTube channel: https://www.youtube.com/watch?v=PMNnEEEacCg&t=2s

Visit Moab at Photoplus

Immerse yourself in the most dynamic, interactive experiences for photographers seeking the newest technologies and techniques that will take their art to the next level.

Visit Moab Paper, Booth 629, at PHOTOPLUS 2019, October 24–26 at the Javits Convention Center, New York, NY.


What’s happening in Moab’s Booth?

Check out these presentations and workshops happening in our booth during Photoplus.

Thursday 10_24 (4).png

The Power of Print: Joshua Holko

Moab Master, Joshua Holko explains why printing his photographs is so important. "I never really feel like I have finished with a photograph until I have made a print." - Joshua Holko.

Joshua Holko, born in Melbourne, Australia, is a full-time professional landscape, nature and wildlife photographer.

“All of my fine art photographs are printed on Somerset Museum Rag. No other paper so beautifully captures all of the colour, detail and subtle tonalities that the natural world has to offer.” - Joshua Holko.

The Power of Print: Les Picker

Learn about why Les Picker prints his photographs and uses Moab Paper for his fine art prints. “I print because that is really the culmination of my artistic vision. Until I see my image on a fine art paper, I feel it is incomplete.” Les is a very successful photographer, photographing for National Geographic publications and many other magazines and newspapers.

Les Picker’s favorite papers:

  1. Entrada Natural

  2. Entrada Textured

  3. Juniper Baryta

  4. Moenkopi Unryu

The Power of Print: Jim LaSala

Learn about why Jim LaSala prints his photographs and uses Moab Paper for his fine art prints. "I printed this image on juniper which has tremendous color latitude and brought out the color exactly the way I had seen." Jim LaSala specializes in Fine Art Photography, Portraiture and Street Documentary.

Jim LaSala's favorite papers:

Entrada Rag

Juniper Baryta Rag

Joshua Holko, 2019 AIPP Epson Victorian Professional Nature Photographer of the Year

1.jpg

The AIPP (Australian Institute of Professional Photography) Victorian State awards, is a favorite of Moab Master, Joshua Holko, because each category he enters is judged in print, not digitally. Joshua Holko is a professional landscape, nature and wildlife photographer specializing in the Polar and sub-Polar regions of the globe. His work celebrates the extreme latitudes of the Polar environment. He is a huge advocate of the print as the finished medium of choice for his own photography.

The AIPP National and State awards remain two of the few remaining competitions to actually judge the finished print and they do so using a panel of judges all deemed experts in their respective genres and accredited as Masters of Photography through their years of success in this arena.

3.jpg

Joshua Holko entered twelve prints spread across the Nature, Documentary and Landscape categories. He took first place overall in the Nature category, what he felt was his strongest point. He also took the Highest Scoring Print award for the Nature Category. As someone who is passionate about print, this was an incredible honor.

All of the prints were printed on Somerset Museum Rag, Joshua Holko’s go-to paper. “Museum Rag has a gorgeous, sensuous texture that is a delight for the senses. No other paper so beautifully captures all of the colour, detail and subtle tonalities that the natural world has to offer. I would not exhibit my work on any other paper."

4.jpg

Chi Shooters Showcase. Raffle. Shoot.

Chi_Shooters_Tilt_530x.png

Chi Shooters celebrates their one-year anniversary with a special showcase on the 94th floor of the Hancock Center.

We’re excited to celebrate the Chi Shooters Anniversary with your artwork along with sweeping views of 360 Chicago! Chi Shooters is a branch of a global network of photographers and creators that promotes and inspires the growth of creative photography worldwide.

Artists are given the opportunity to submit their work to showcase and sell up to three pieces at the gallery event.

This event, June 6th 2019, also functions as a photography meetup for golden hour and sunset!

**Use the promo code CS360 for free tickets upon registering on Eventbrite**

We’re teaming up with Photo Innovation Lab to offer to get your work printed and handcrafted on the cotton based museum quality paper  that we launched the business with for a fraction of the original cost! All prints will be on Entrada Rag Natural 300 16x20 and 12x18 size paper with your choice of Full Bleed or 1/8in White Border. 

CYBERNOIR: Where the past and future collide

Join us for the opening recpetion of photographer, Dave Krugman’s, first solo gallery at Sony Square in NYC April 12th, 2019 at 7pm. All prints will be on Slickrock Metallic Pearl printed by LTI Lightside.

“This collection of work from Dave Krugman evokes the cinematic style of film noir that has been blended into the futuristic motifs of a cyberpunk backdrop. These rainy, neon lit streets are washed in light- watercolor landscapes that subjects move through like film sets. The images are foundations for the imagination to build stories upon. Transparency, shadow, water, artificial light, umbrellas and sweeping vistas- these variables combine to create a world that will immerse you in its depths.”

NASA's Farthest-ever Flyby Mission Behind the Scenes Photographs by Michael Soluri

Moab Master, Michael Soluri, follows the 13-year journey of NASA’s New Horizons probe of Ultima Thule mission.

National Geographic published a story on the history of the mission with Michael Soluri’s Photographs throughout the journey. Read the full story here.

Michael_Soluri.jpg

“It ... was long days,” Soluri says, but “I knew it would have meaning: This was the first reconnaissance of the Kuiper belt, and I was there with them as it happened.” - Michael Greshko (National Geographic)

The images taken by Michael Soluri will be printed on Juniper Baryta Rag.

The images taken by Michael Soluri will be printed on Juniper Baryta Rag.